
Buchla Easel analogue synthesizer clone
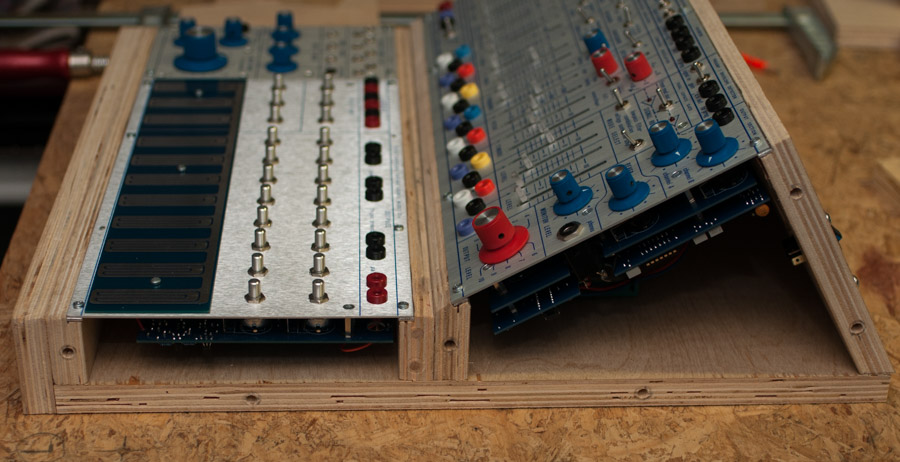
I have been working on finishing my Buchla Easel analogue modular synth the last couple of months. That included designing a custom cabinet to house the modules. My “Easelesque” instrument contains 3 modules: the Buchla 208 Music Easel, the Buchla 216 Touch Controlled Voltage Source and the Buchla 277 Signal Delay Unit. All these modules are clones of the original Buchla 200 series of the 70’s. I still have to debug the 216 module as it doesn’t work correctly yet. The 277 might be replaced by some kind of joystick module in the future but I’m not sure about that. I first need to spend more time with the instrument. I do love the 208 though. It’s a complete instrument in itself and the 216 keyboard will only broaden the possibilities.
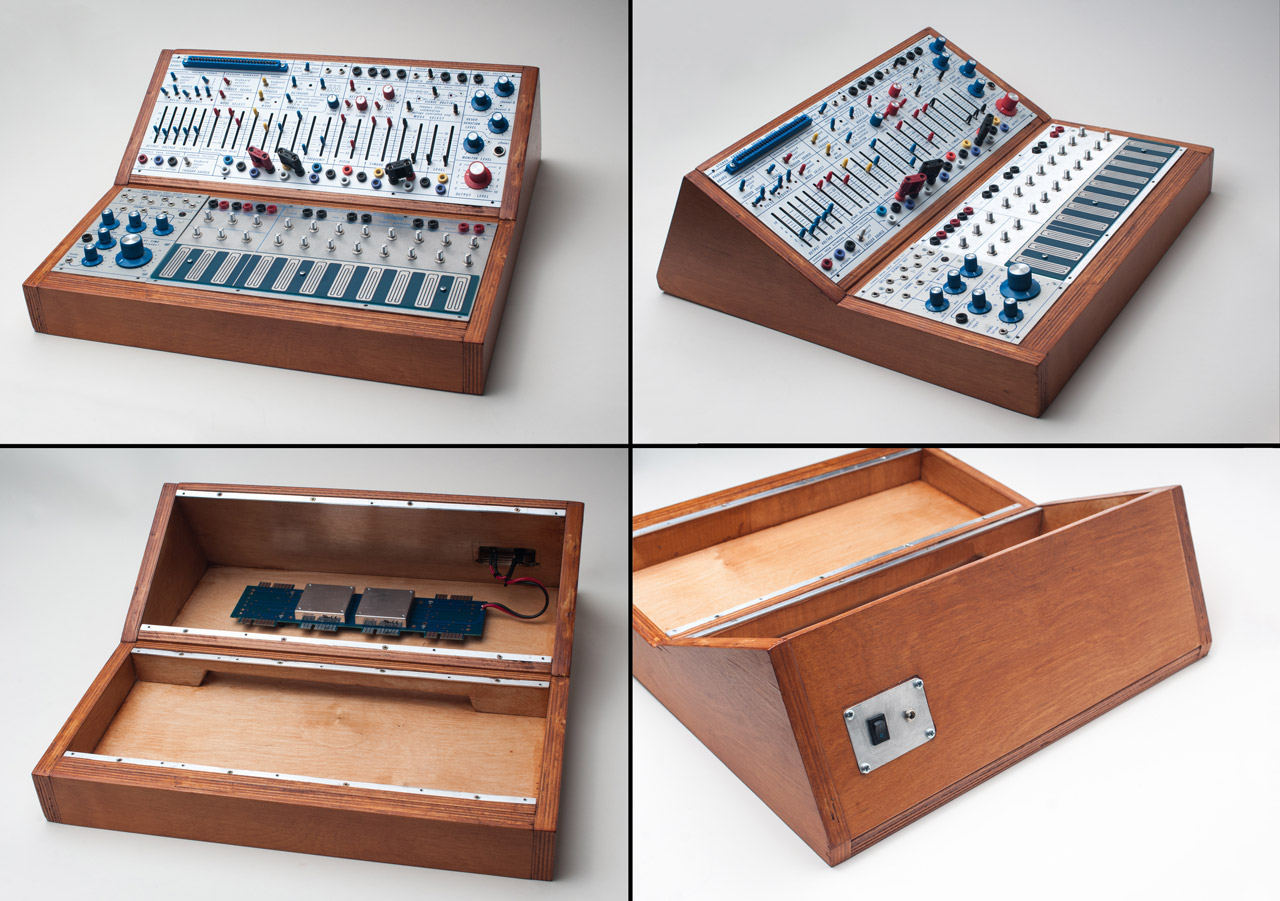
I wasn’t going for an exact 1:1 copy of the original configuration. I wanted the Buchla aesthetics and usability which I really like. The real Buchla Easel uses the 218 Touch Activated Voltage Source module but my version uses the simpler 216 Touch Controlled Voltage Source module. Same goes for the 208 Stored Program Source which is not a perfect copy of the original but uses modern components. I don’t see the added value of paying $100 or more for a vintage opamp to get “exactly” the same sound as the original. The modern components get close enough and the resulting sound still has the Buchla characteristics which is good enough for me. And as it is an 100% analogue synthesizer it will never sound the same twice anyway…
Custom cabinet design
Since I started building the 208 I was thinking about a wooden cabinet for the instrument. I like the Buchla suitcase version of the Easel and I really thought about going that route. The portability is excellent and that was something I was trying to incorporate in my own design. The Easel is a performance instrument and it should be easy to bring it along where ever you want to go. However, the thought of a wooden enclosure eventually won me over. I somehow prefer a nice wooden cabinet for housing analogue stuff. Especially with the light aluminium panels which are a nice contrast with a darker tint of wood.
I knew pretty fast I wanted the 208 angled in the cabinet with the 216 and accompanying panel mounted horizontally in front of it. After that it was just a matter of figuring out the minimum dimensions needed to be able to fit the modules.
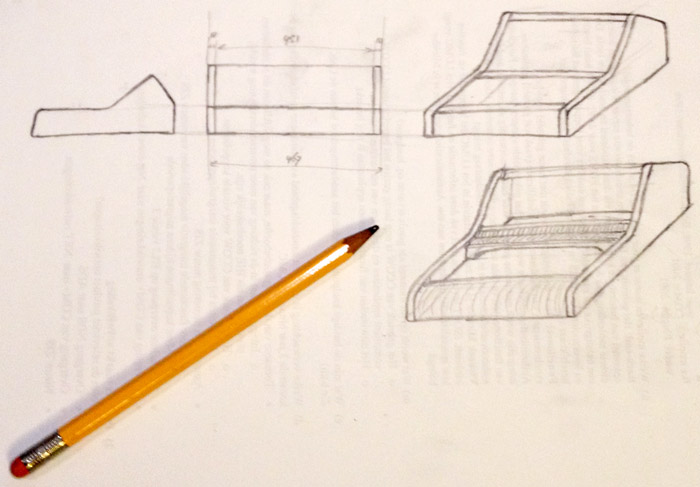
Having the basic structure of the cabinet figured out I had to come with a solution for securely mounting the modules. I decided to use Aluminium strips with threaded holes for use with standard M3 screws.
Building the cabinet
Looking through my pile of scrap wood I found a large enough piece of wood that would fit both side panels of the cabinet and the bottom panel. I have always used 18 mm Birch plywood for building my cabinets and this one was no exception.
Cutting the parts was pretty straightforward using a circular saw.
When I had all the pieces I needed I fitted everything together to see if all was OK.
I then routed slots in the 4 supporting wood pieces so the front panels would be flush with the surface of the cabinet when mounted to the Aluminium strips (see picture below).
After a final test to see of all the intended modules would fit, I glued everything together and let it dry for a night.

After that I sanded the cabinet and applied 3 layers of Mahogany stain and 4 layers of protecting lacquer.
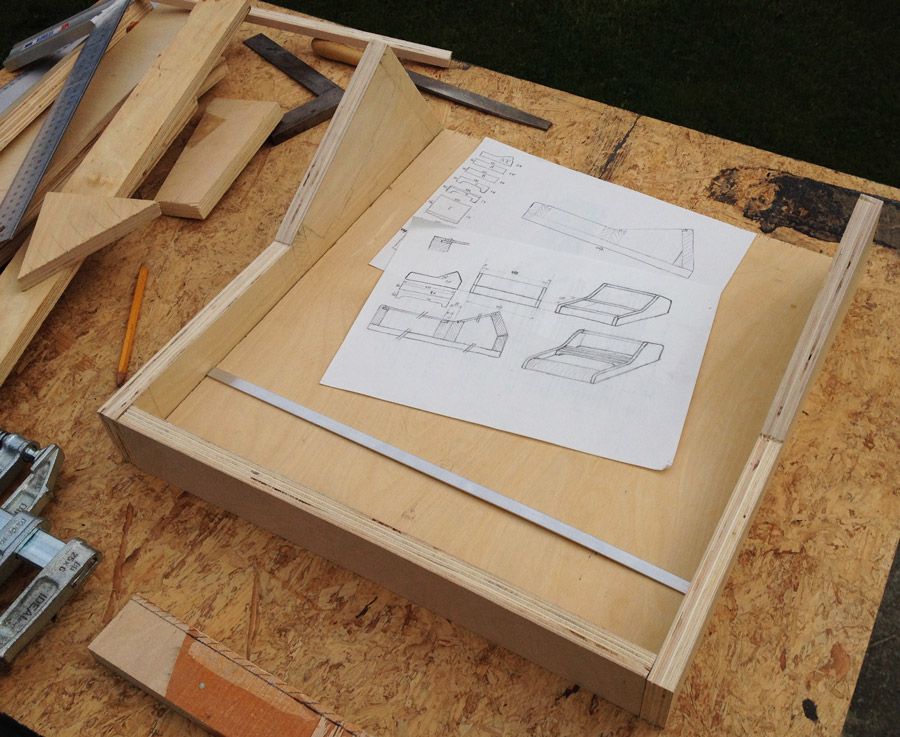
The electronics
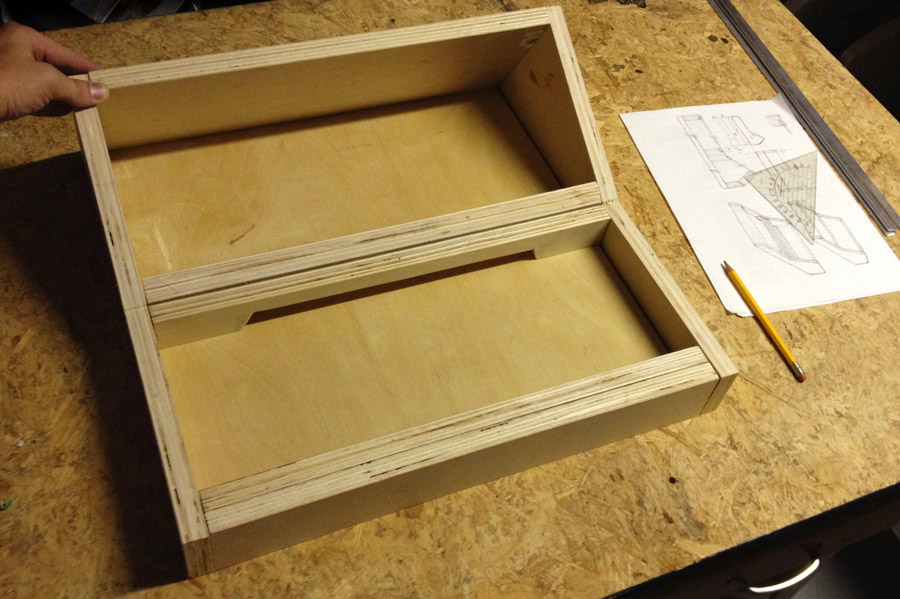
The electronics part of the cabinet is pretty simple. A power distribution PCB with Cincon 12 to 15V DC-DC converters, an on/off switch and a 2.5 mm jack for connecting the external 12V DC power supply.
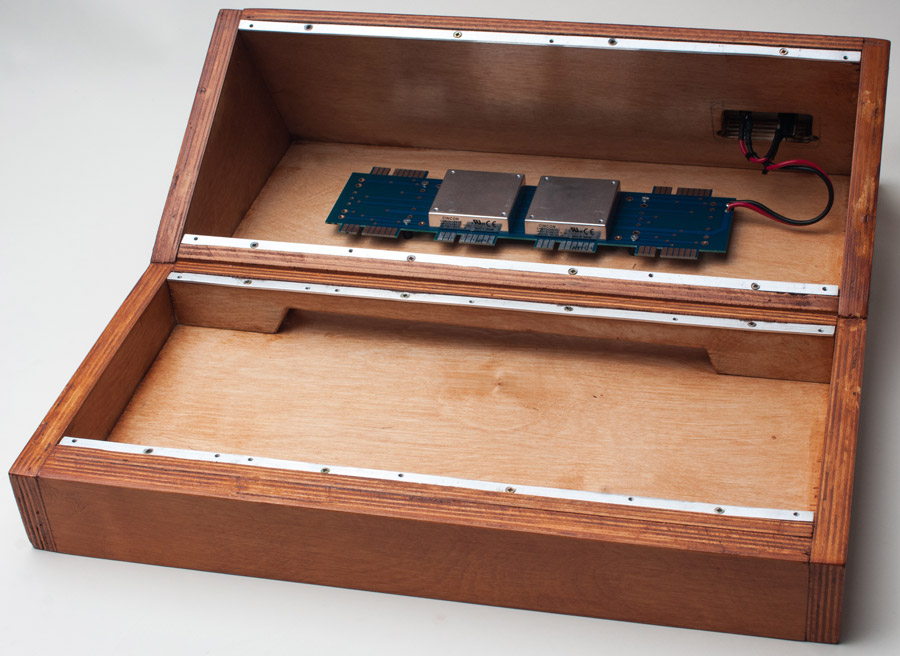
I did notice the DC-DC converters get pretty warm after a while. So I think I will use some sort of heat sink on the converters and drill a couple of small holes in the back of the cabinet to get a bit of ventilation going.
Conclusion
I played around with the instruments a couple of evenings and really enjoyed it. The cabinet is very portable and can easily be brought along when going somewhere. For safe transport however I do need some sort of flight case.
I’m very pleased with the end result and after I have debugged the 216 keyboard module I’m looking forward to diving deeper into this beautiful classic instrument.
Comments
4 responses to “Custom cabinet for Buchla Easel”
Hi,
I just saw you nice DIY Easel-Case. Would you mind telling me where you’va got the Buchla busboard from ?
Thanks
Steffen
Hi Steffen,
I bought the bus board from someone on the Muffwiggler forum at http://www.muffwiggler.com/forum/. Look for user boops.
Unfortunately the forum is currently being rebuild after being hacked so at the moment I cannot link to the post there. I will update the URL when it is available again.
EDIT: Here is the link to the thread for boats, bus boards and related Buchla DIY stuff: http://www.muffwiggler.com/forum/viewtopic.php?t=128877.
Andre.
Hi Andre,
do you know how much current the dc-dc converts need to produce?
Doesn’t it need 5v too?
Thanks
jonas
Hi Jonas,
The Cincon DC-DC converters used can deliver 5A (15V) and 15A (5V).
The 208r uses about 800mA and the 216r about 200mA. Both modules only need +15V and -15V, no +5V needed.
Andre.