A modular hardware sequencer
I discovered the Midibox sequencer MBSEQ V4 via a forum post somewhere and was immediately interested. It’s a project of Thorsten Klose and lots of people have added code and hardware modules to it.
For more information check out the following websites.
http://ucapps.de/
http://midibox.org/forums
The main thing that made we want to build this sequencer was the modular approach. You can build your own custom system and are not limited to a predefined configuration.
I wanted to be able to control MIDI equipment as well as modular synthesizers and this is pretty easy to do with the MBSEQ V4.
Design considerations
After researching the possibilities I decided on the following components for my version of the sequencer.
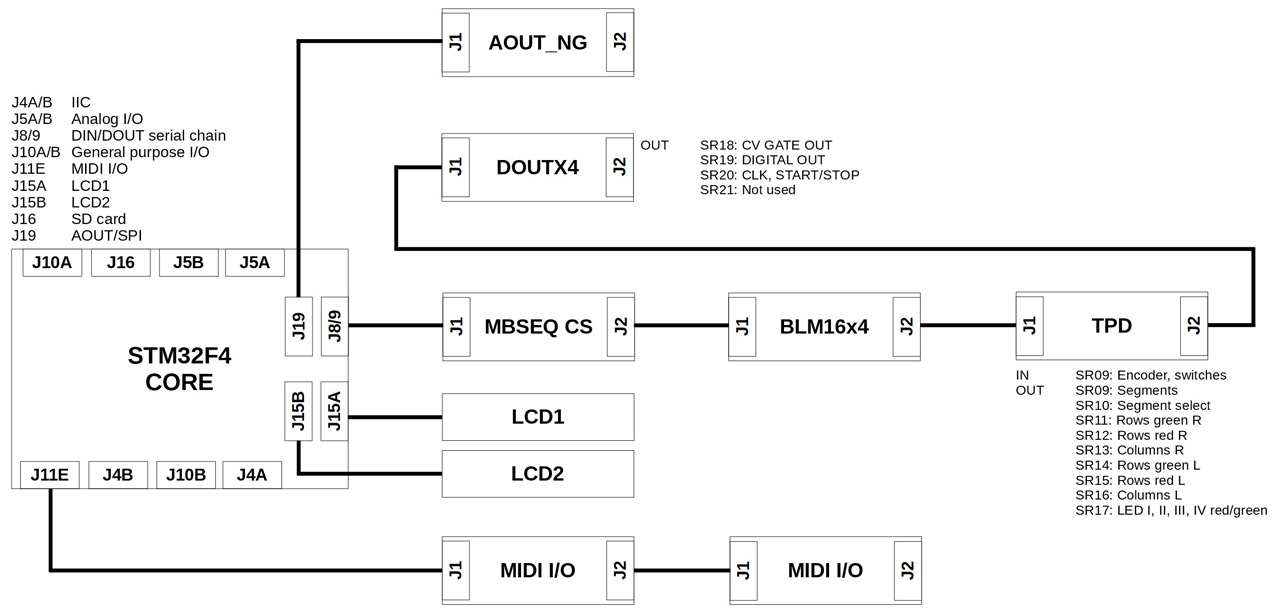
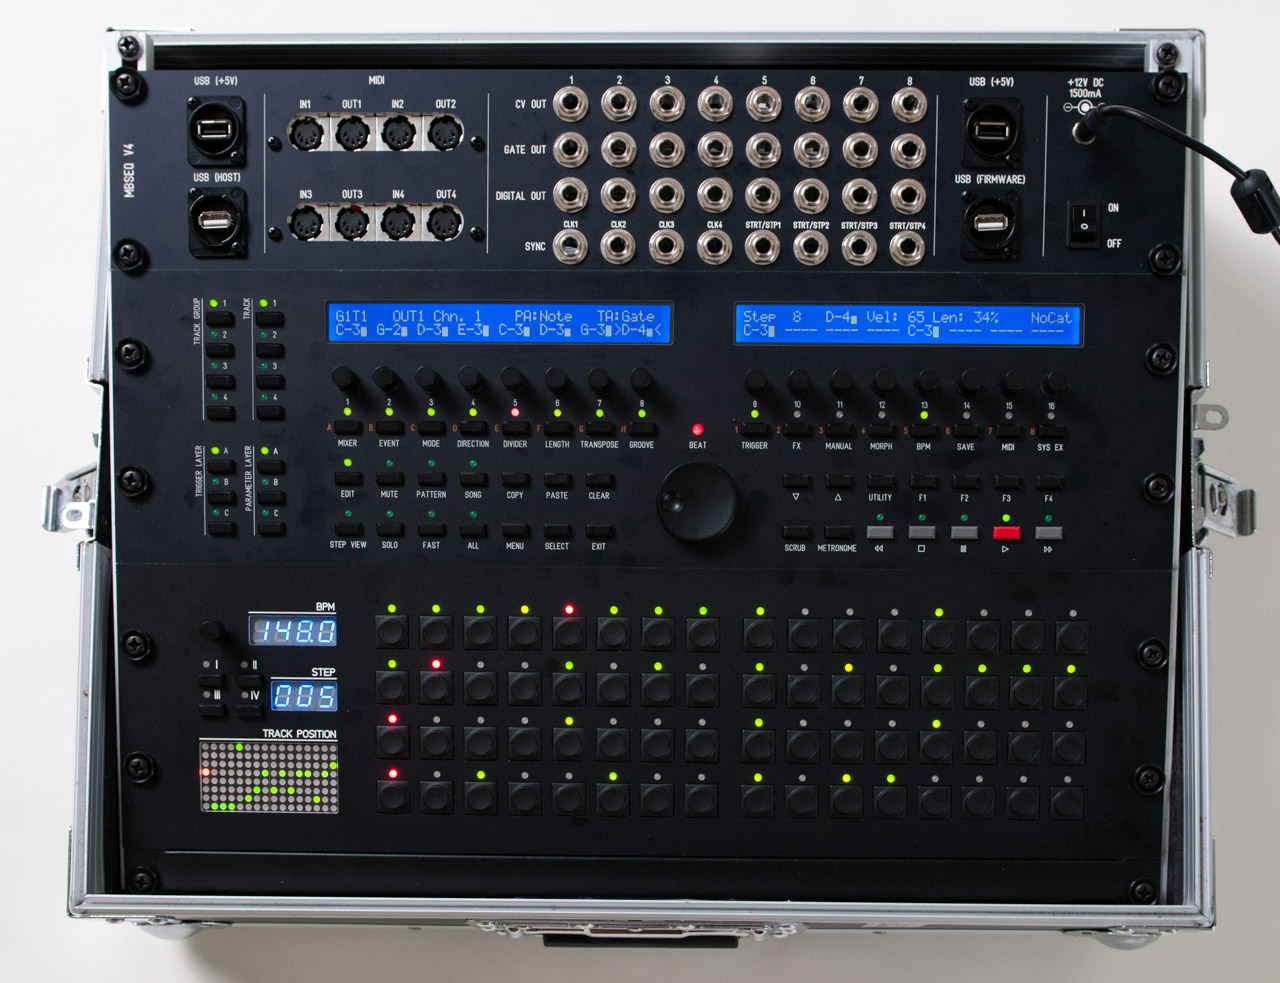
- STM32F4CORE: STM32F4 ARM processor based microcontroller core, the brains of the sequencer
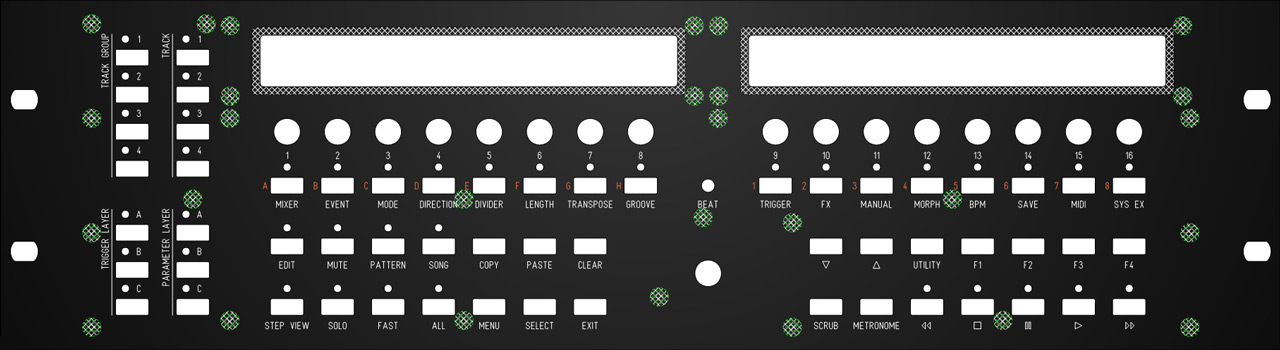
- MBSEQ CS: Wilba Control Surface, lots of buttons and rotary encoders for controller all functions
- BLM16x4: 16 x 4 button matrix for easy pattern programming
- TPD: Track Position Display, displays the current BPM and position of every track
- 2 x MIDI I/O: MIDI interface, a total of 4 MIDI IN and 4 MIDI OUT
- DOUTX4: 4 x 8 digital outputs
- AOUT_NG: 8 CV outputs (1V/oct)
I did think about placing the digital outs and CV out modules outside of the main sequencer using line drivers so the sequencer did not have to be near the modular synthesizer. I did test the configuration and it worked as it should. See the line driver configuration pictured below.
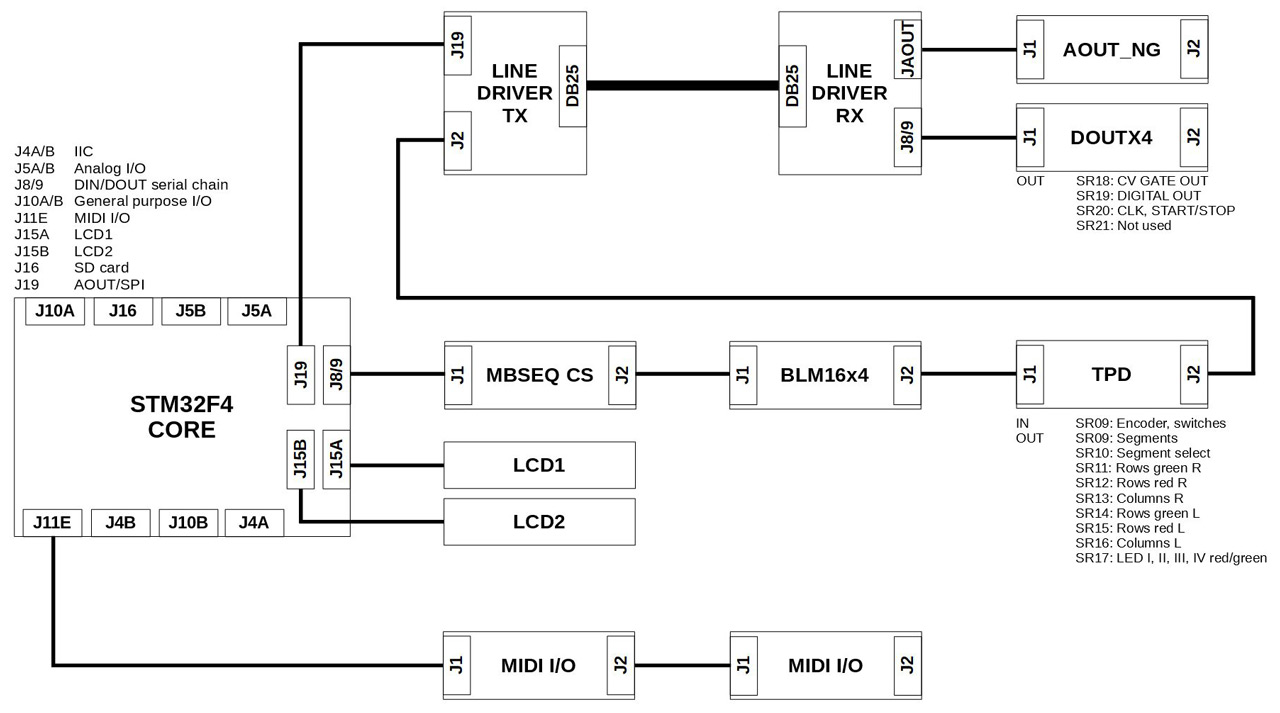
However, I decided against it as I wanted the sequencer to be a self contained unit with all functionality in one box. The diagram below shows that final configuration with connections between the modules.
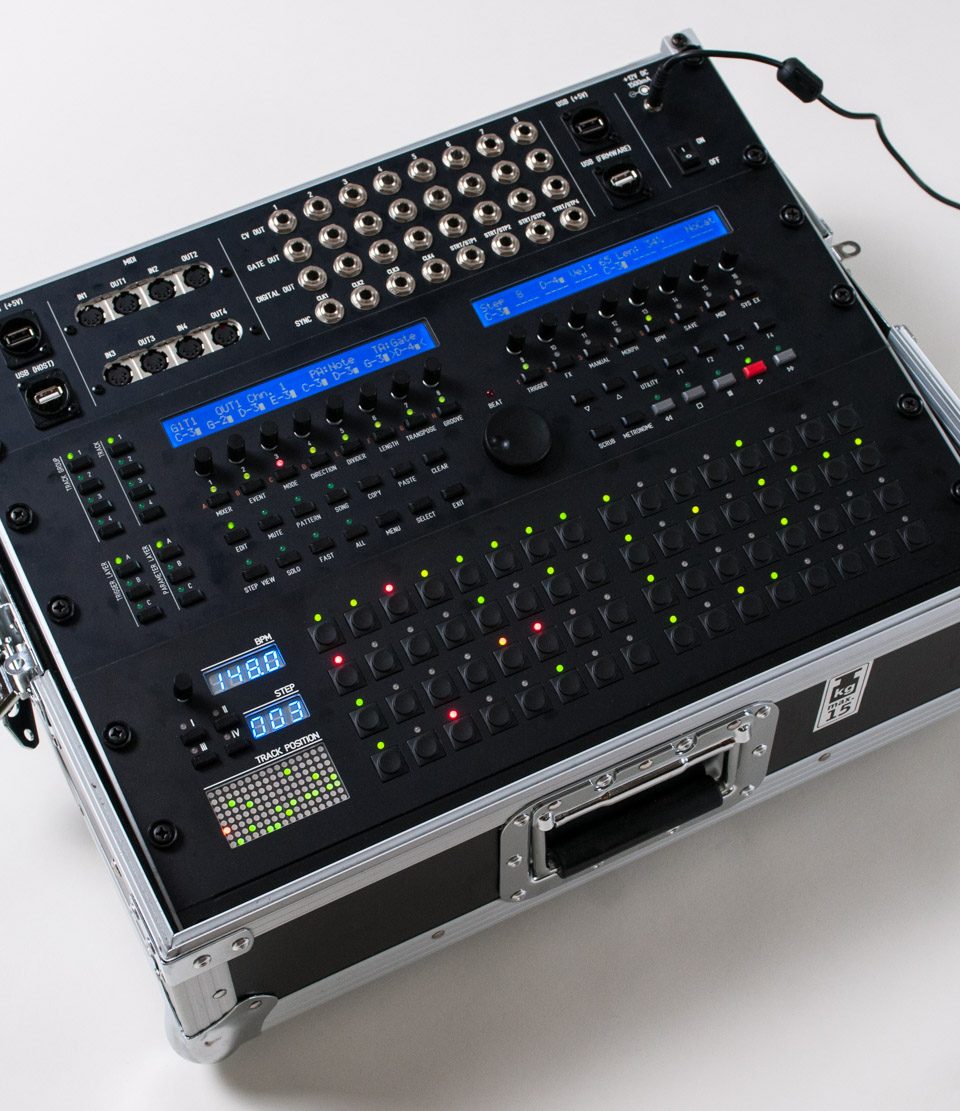
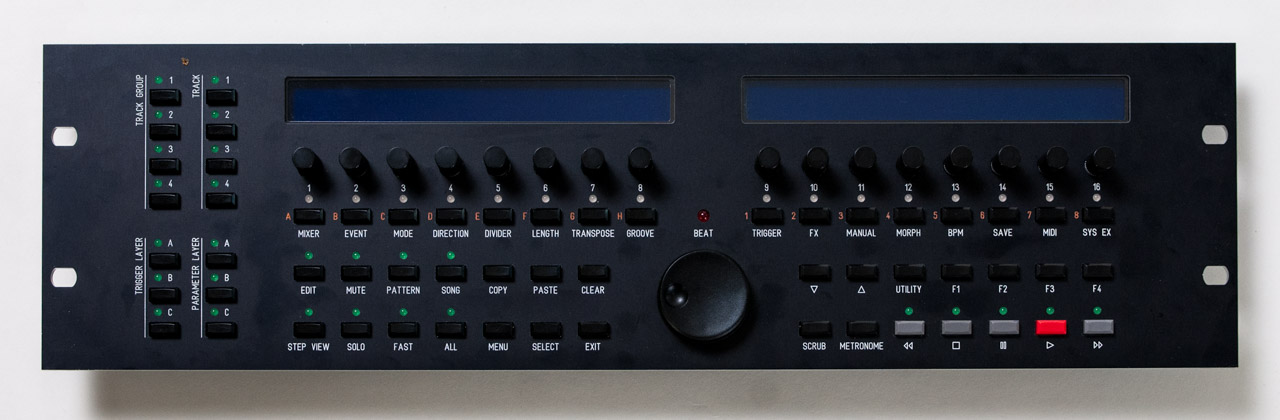
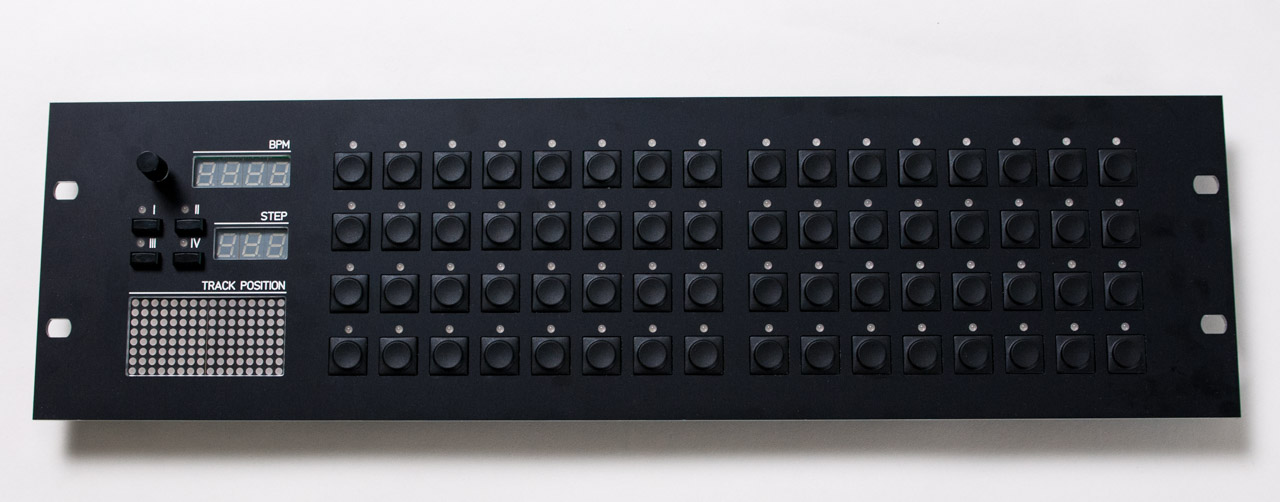
Main panel
I started with the main panel. This contains the Core module, 2 LCD’s and the Wilba Control Surface module which contains all the buttons, rotary encoders and LED’s. As I wanted to house the sequencer in a 19″ rack case, all panels are compatible with the standard 19″ rack dimensions. I downloaded a Front Panel Designer panel design from the Midibox forum and added studs to make mounting the control surface PCB and LCD’s a lot easier.
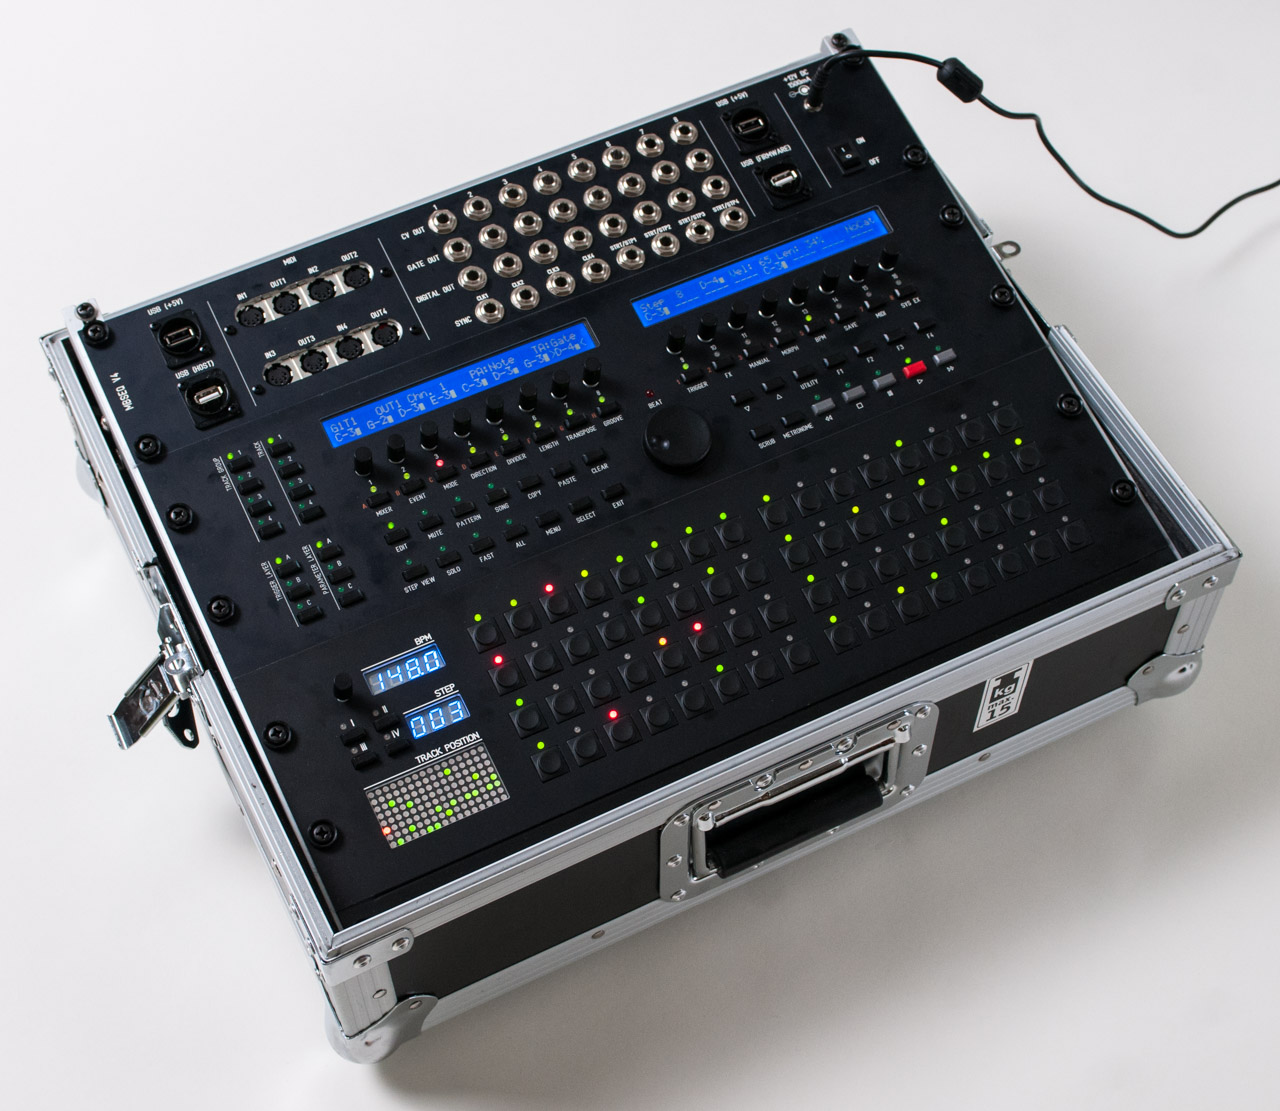
And this is how the final panel looks.
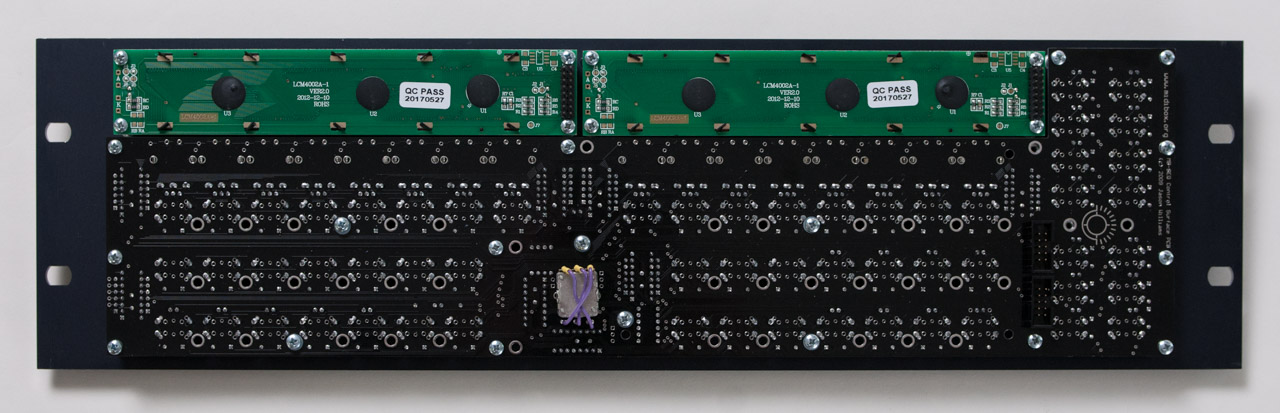
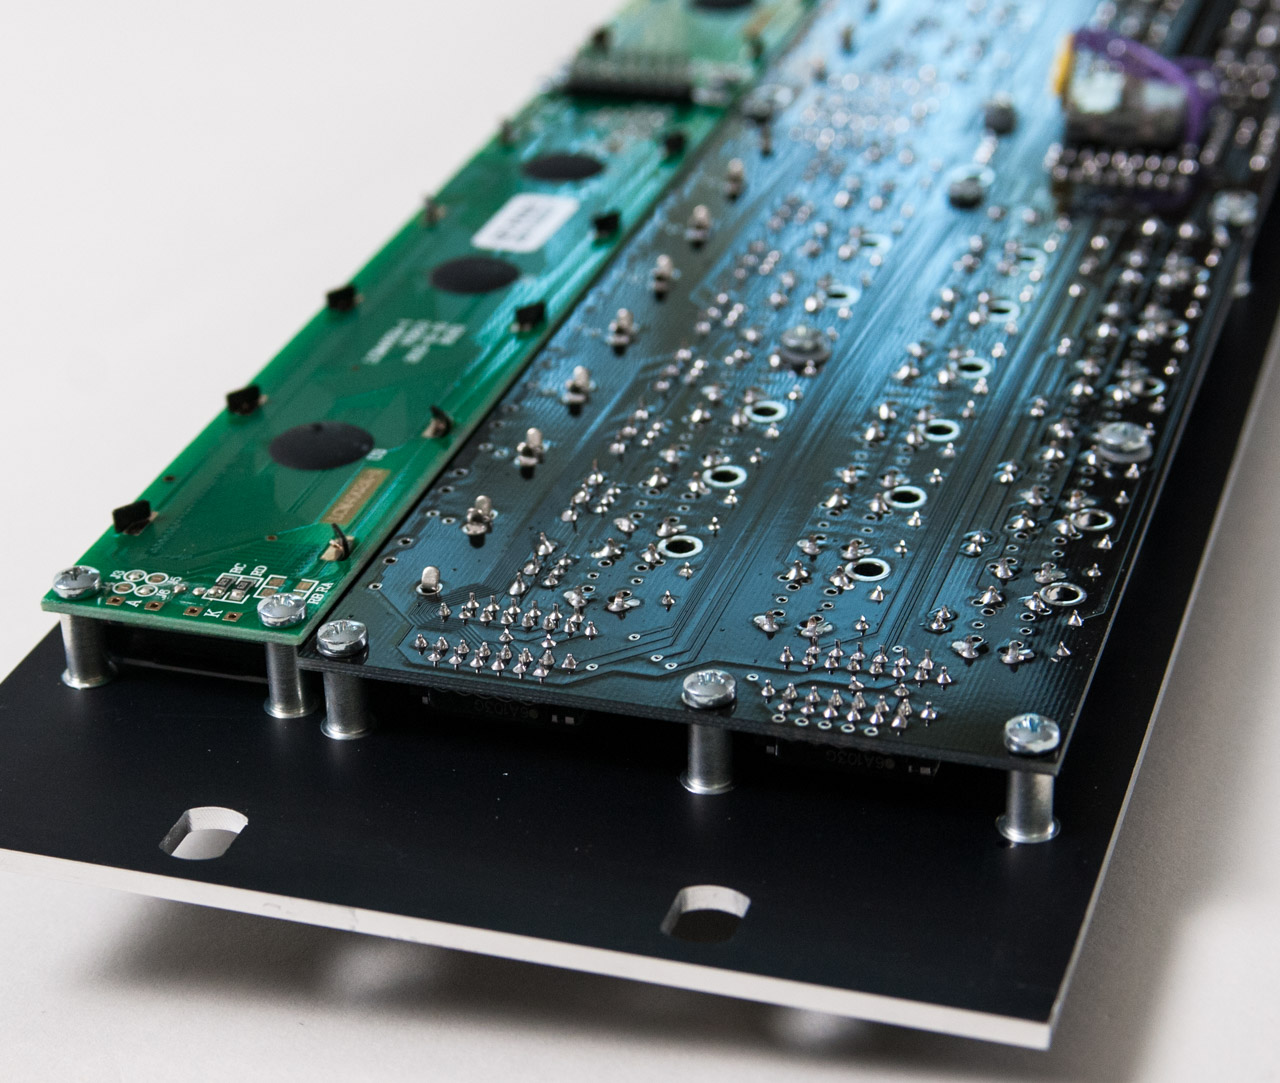
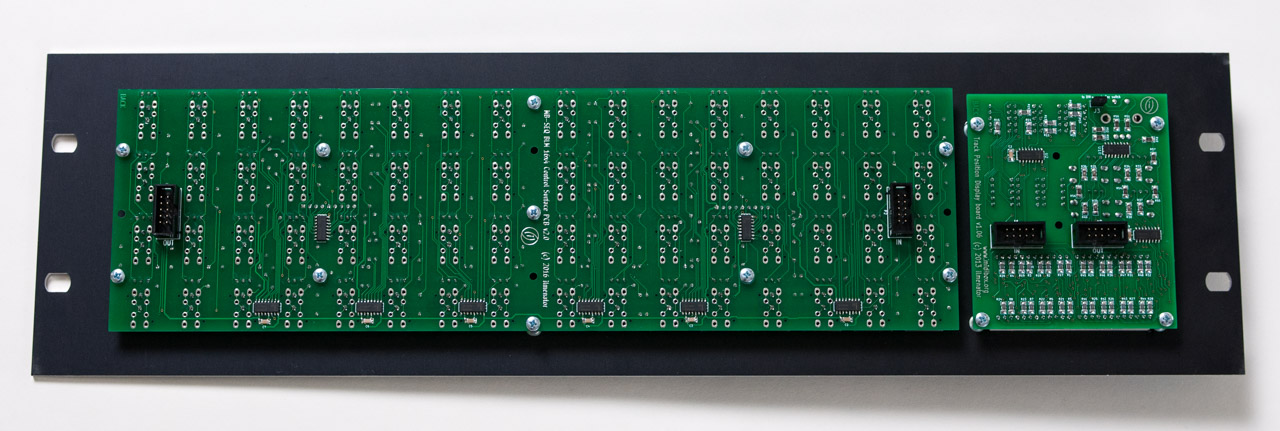
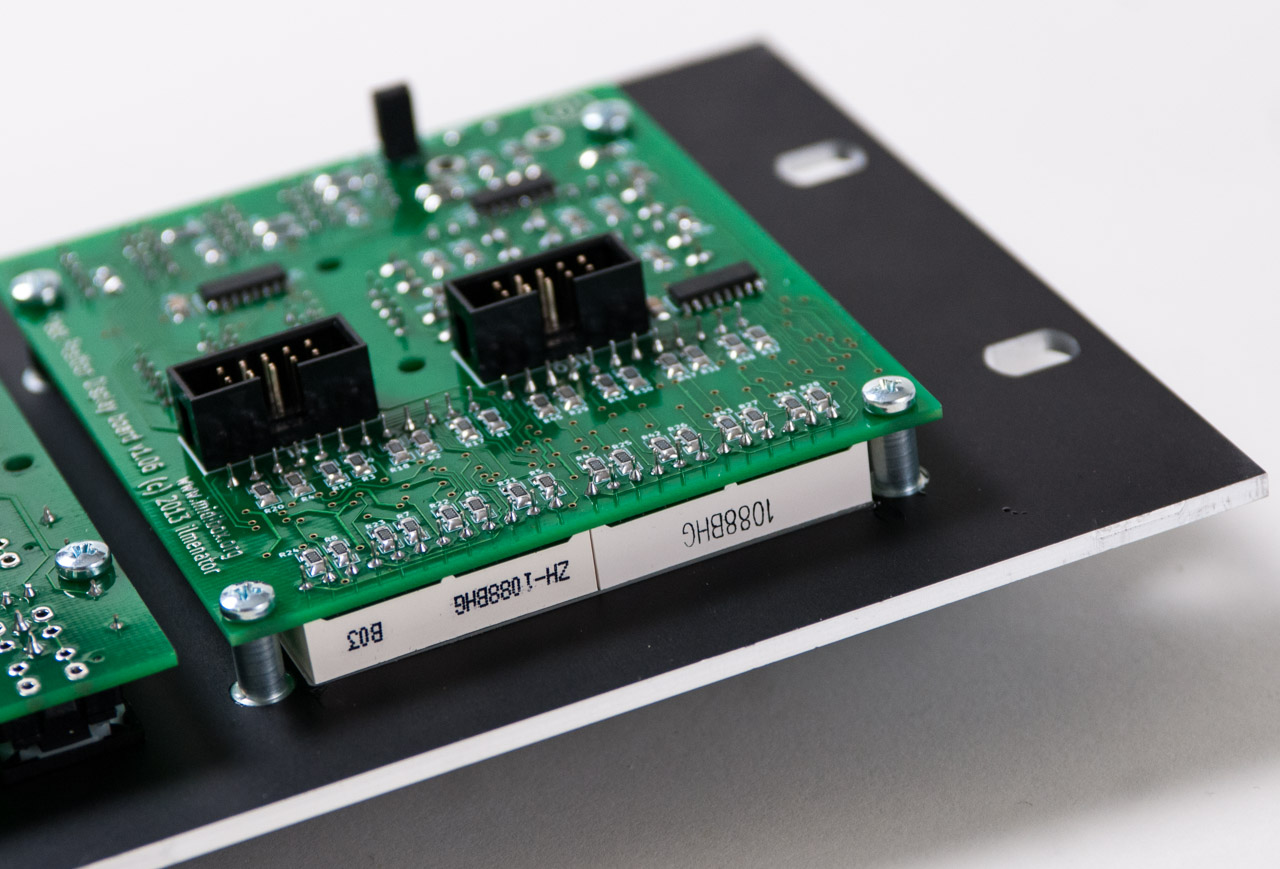
Track position display and button matrix panel
The second panel contains the 16×4 button matrix and the track position display. For this panel I also added studs to an existing design to make assembly of the panel much easier.
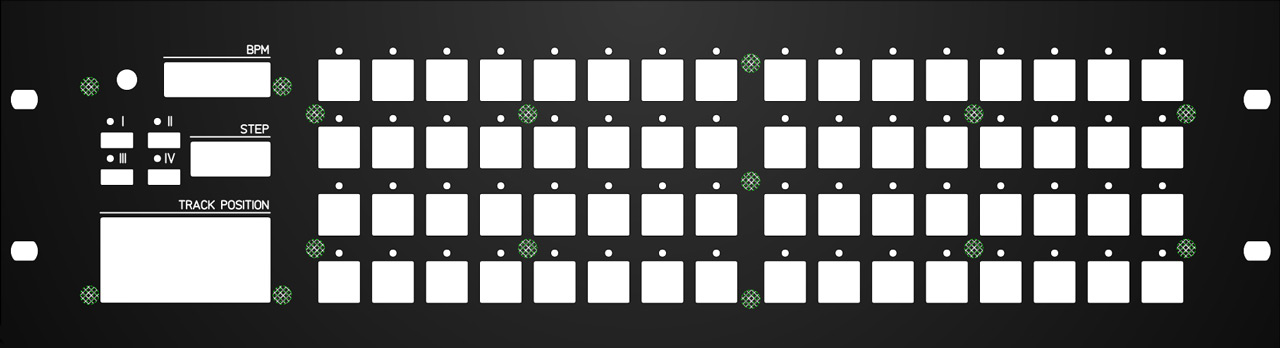
– TPD/BLM16x4 front panel FPD file
And here are pictures of the final result.
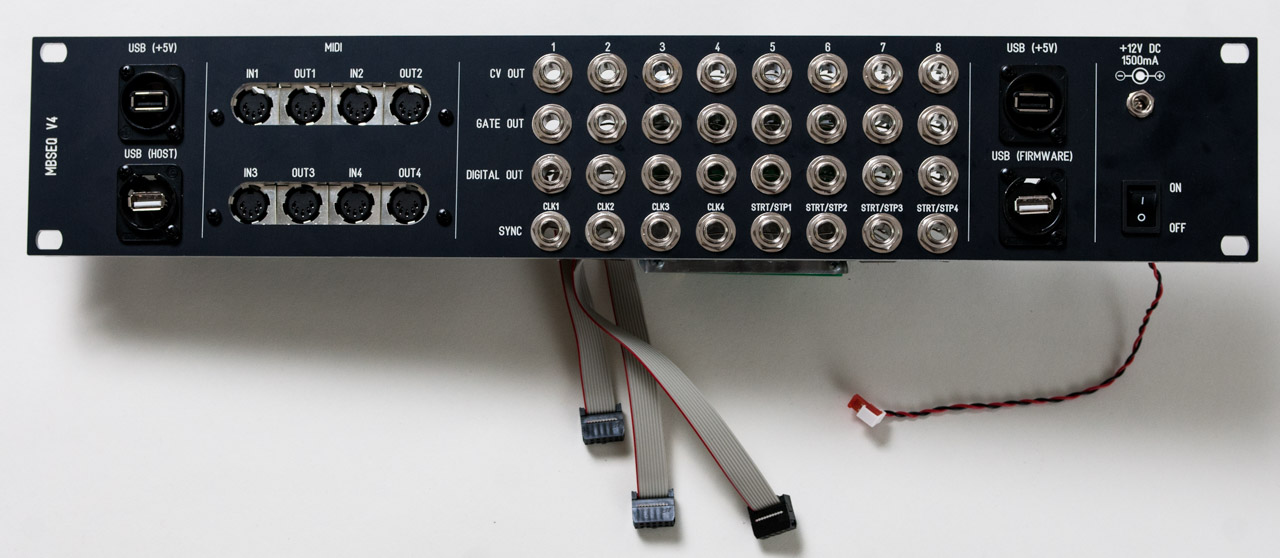
I/O panel
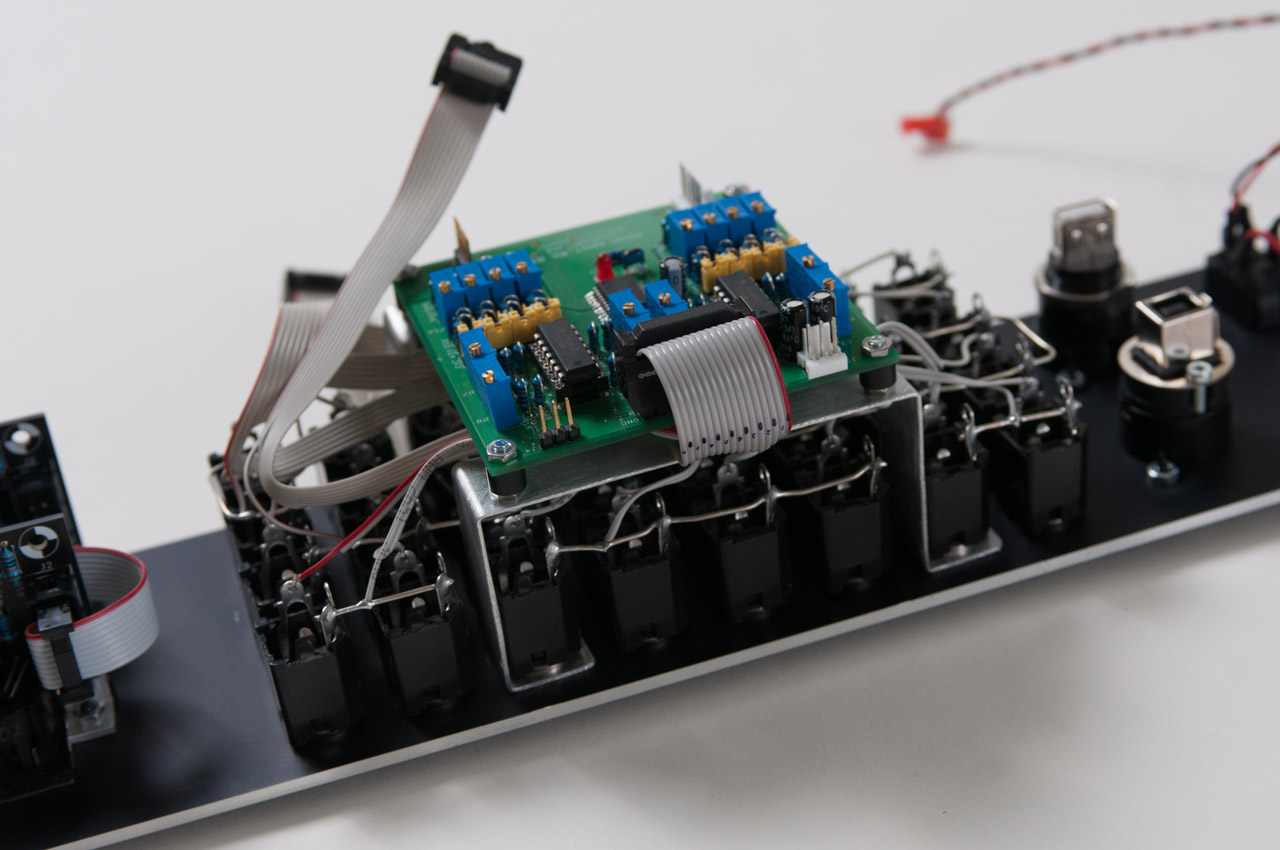
The third and last panel holds all input and output connectors. This is a custom design panel by myself. All I/O PCB’s are mounted directly to the panel except for the DOUTX4 PCB which is mounted in the rack case and connected to the panel connectors with flat cables.
The panel also provides 2 USB +5V connectors for connecting LED lights or other peripherals. The other 2 USB connectors connect to the core PCB and provide a way to upgrade the core board firmware and the MBSEQ firmware (these are 2 separate USB connections on the core board).

The final panel looks like this.

The 19″ rack case
I ordered the Thon Rack Case 8U 12 RA from Thomann in Germany. My MBSEQ V4 fits perfectly in there. There is even about 1 HE left. I used a black panel to fill that space.
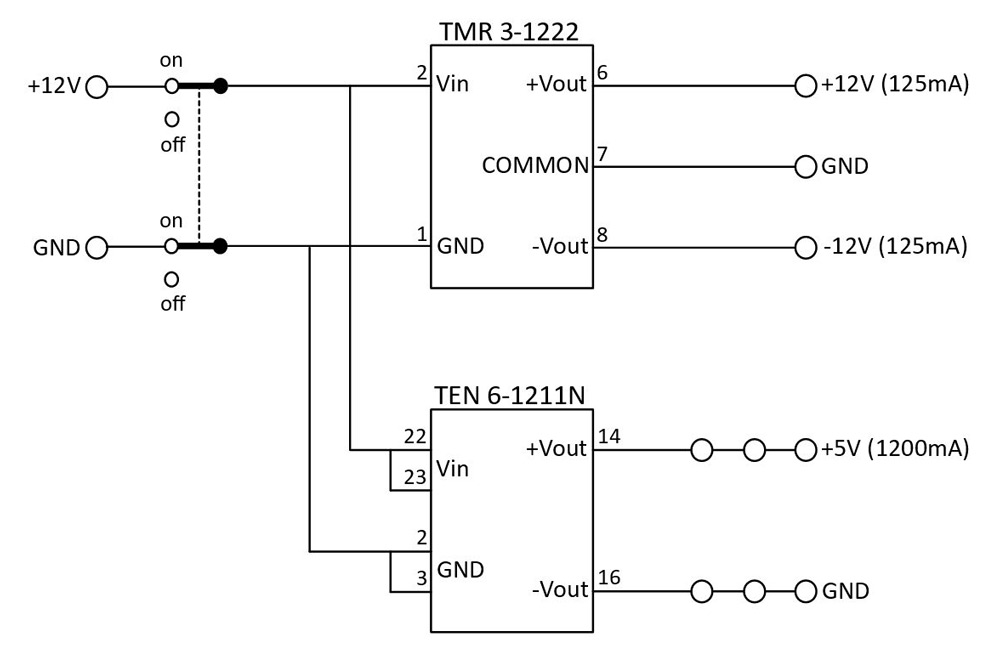
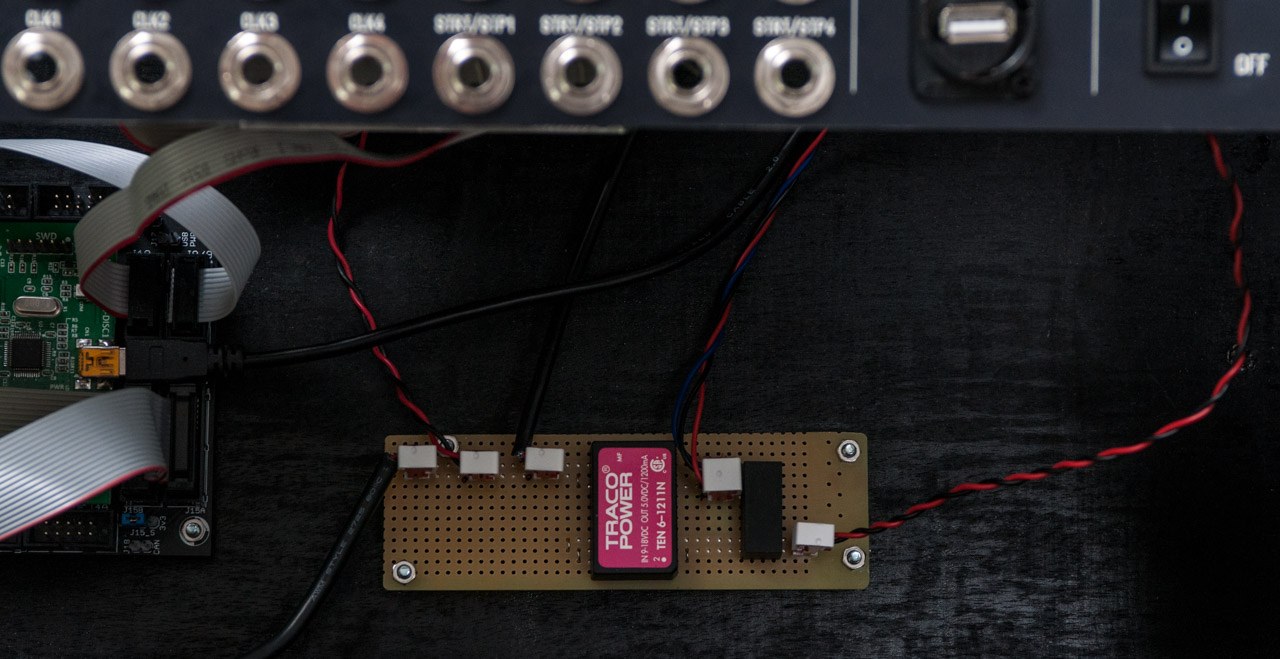
On the bottom of the case I mounted the core module and the DOUTX4 digital out modules. I also installed a custom PSU (DC-DC converter) which provides +5V (for the core board and the USB ports on the I/O panel) and +12V/-12V (for the AOUT_NG module).
I’m very happy with the end result. The panels fit neatly in the 19″ case. The 19″ rack in the case is a bit angled which improves visibilty of all display and controls.
Although I will be using the sequencer mainly in the studio for now, it will be very easy to bring it along for a jam session of performance.
Conclusion
It took a bit of time to build this sequencer but it is a fairly easy build. There is some SMD soldering involved for several modules but nothing extreme. All PCB’s are available at Modular Addict.
I enjoy working with this sequencer. Although I just scratched the surface of its possibilities it is rather intuitive. You do need to read the manual for certain things but that’s OK by me. Below are 10 great tutorial videos by Andrew Scheidler which explain some of possibilities of the MBSEQ V4.
Comments
4 responses to “Midibox sequencer MBSEQ V4”
Hallo,
Kan ik die Midibox versie van u kopen?
Nee, de midibox is niet te koop. Ik heb de sequencer gebouwd voor eigen gebruik.
Prachtig project, ik heb onlangs een midibox kunnen bemachtigen en denk erover deze ook rackmount te maken en uit te breiden met cv en step panel. De panels zijn erg fijn zo met die studs!
Yep, hoe langer ik met deze sequencer werk des te meer ik onder de indruk raak van zijn mogelijkheden!
Ik kan je de CV uitbreiding zeker aanraden, het maakt het werken met een modular echt fun.